User Manual
This section explains everything from setup to basic operation of the AlterLock Gen3 device.
1. Introduction
Operating procedures for AlterLock devices and AlterLock apps are subject to change as services are improved or features are updated.
Please note that the content of this setup guide is also subject to change without notice.
2. Package content
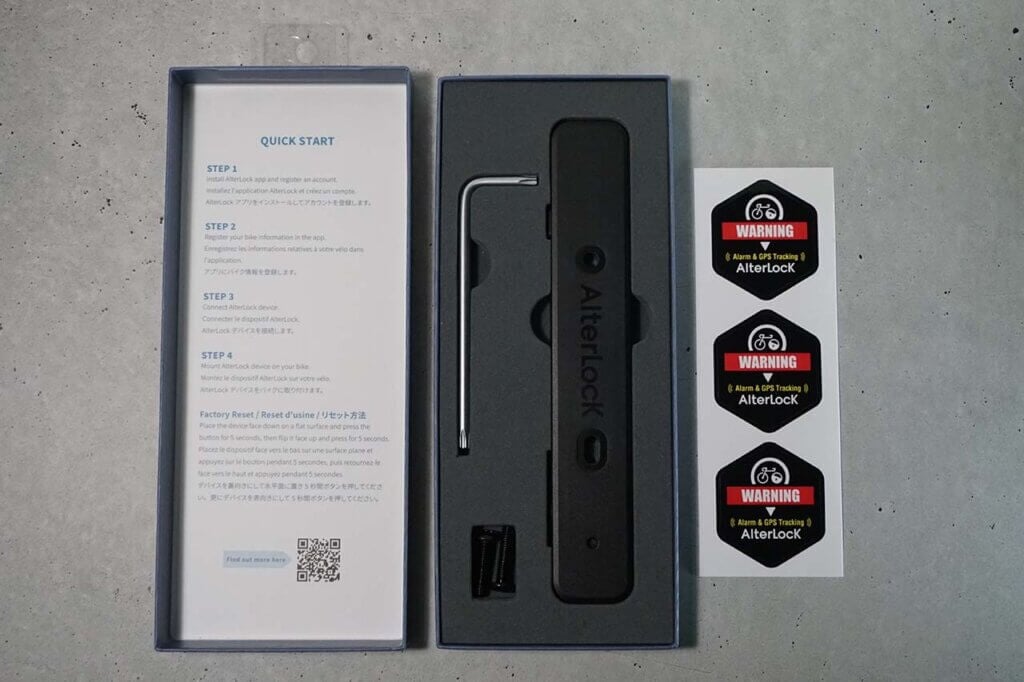
The AlterLock package comes with the following:
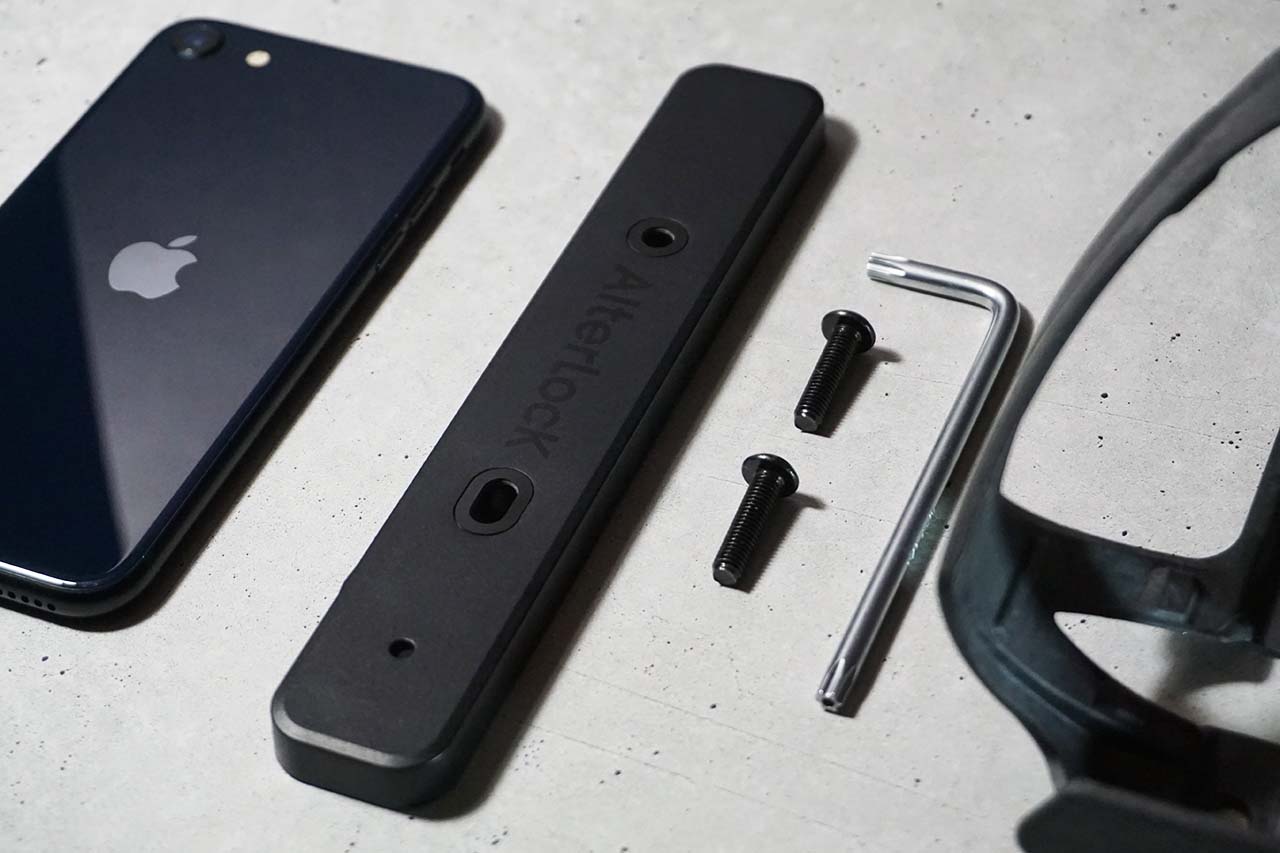
- AlterLock Gen3 device body
- 2 security bolts (M5 x 20mm)
- Mounting tool
- Stickers

*Please prepare the USB Type-C cable for charging separately.
3. Preparation before use
3-1. Charging the device
Please open the charging port cover and charge the battery before use. Close the charging port cover tightly when using the product.
| State of charge | LED indication |
|---|---|
| Charging | Red light |
| Charging complete | Blue light |
| Low battery | Yellow light |
*When charging with a mobile battery, the LED may turn off even when charging is incomplete.
*Can not be turned on when the yellow light is on. Please charge the battery for a while before usage.
3-2. Device installation
Mounting on Bicycle
The side with the “AlterLock” logo printed on it is the front surface of the device. Please install the device with the front surface facing outward.
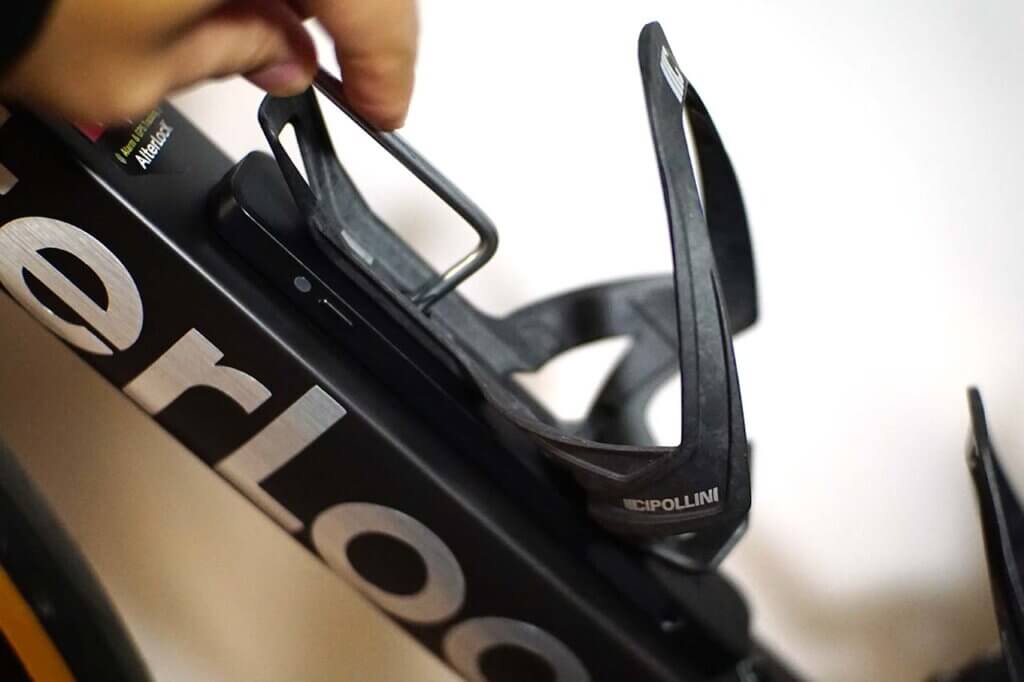
Align the device’s mounting bolt holes with the bicycle’s bottle cage base for installation. Mounting the device together with the bottle cage may help make the device inconspicuous.
If you do not have a bottle cage mount, please consider using a commercially available bottle cage adapter.

*To prevent damage to the product or bottle cage, install the bottle cage with the tightening torque of a standard bottle cage (2 Nm or less).
*If the device is forcibly installed when there is interference between the mounting point and the device, this may cause the device to be damaged. Please install the device in a location where there is no interference, or prepare spacers separately.
Installation on motorcycle
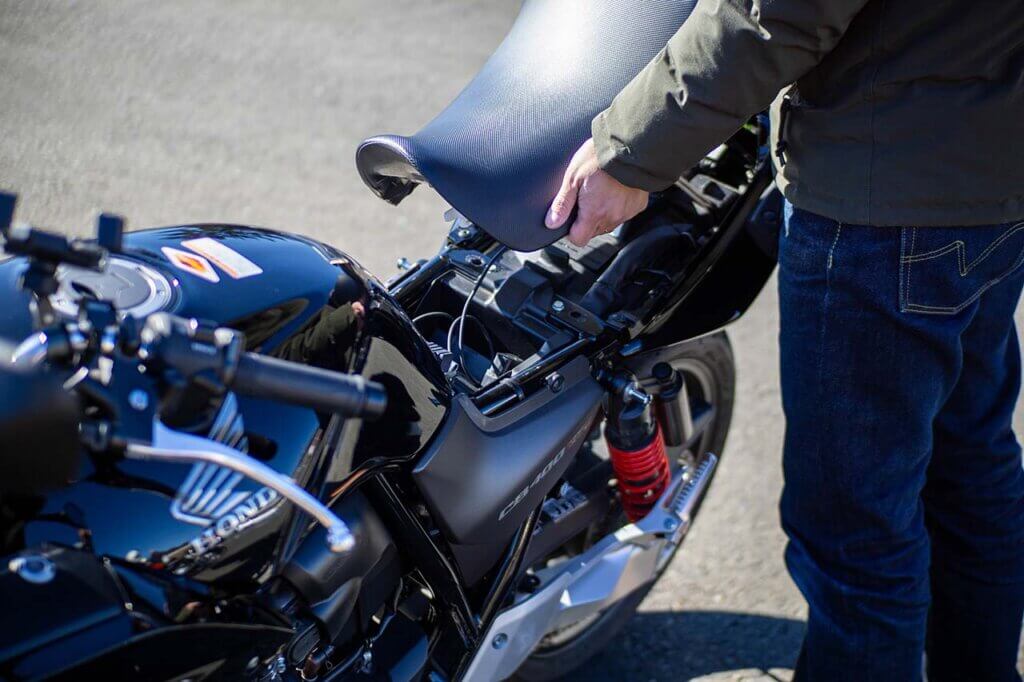
Install in a tool box space, deep under the seat, or inside the cowl, securing with a band or nylon strap.
A bottle cage adapter may be used to mount around the handlebars etc but do so with caution and out of harms way to the rider in all circumstances.

*Avoid areas with high temperatures, such as near the engine or exhaust pipes.
*Mount the antenna so that it is not grounded to a metal-covered area or a large metal surface. Keeping it away from metal parts can improve the radio wave efficiency of various communication antennas.
*Please keep a distance of at least 20 cm from the body.
*Please be aware that alarm sound maybe be reduced when stored under the seat, etc.
3-3. Installing the application
You can download the app for iOS and Android for free from the links below.
Launch the application and log in. If you do not have an account, please register a new account through the application.
You will be prompted for multiple permissions when the app starts. Please select Allow all; access to smartphone notifications, Bluetooth, and location information, as well as app. operation in the background, are required to use the AlterLock device’s features properly.
4. Service agreement
Subscription to service agreement is required to get the most out of your AlterLock Gen3 device.
Please follow the procedure from this page in your browser. You can also subscribe to the service agreement through in-app billing. In the case of in-app billing, the usage fee may differ.
AlterLock Gen3s’ alarm function and notification function can be used within Bluetooth range without service subscription. With service subscription, all functions including LTE-M / NB-IoT transmission, remote notification and location tracking will be available.
For AlterLock Gen1 and Gen2, service subscription is required to use any and all functions including device registration.
5. Device registration
5-1. Enter information on registration
- On the main screen of the application, select and select the type of vehicle (bicycle, motorcycle, car, or other).
- Follow the prompts to enter information about the registration type and tap Register.
*The photos to be registered will be displayed in 16:9 size. Please use an image editing application to prepare 16:9 photos in advance for better results.
*You can edit the information on the registration field at any time, however, you can not change the type of registered vehicle. If you need to change the type of vehicle, please delete the profile and then re-register from the beginning.
*To prepare for the worst case scenario of theft, it is recommended to enter the VIN number or other identification number so you will have vehicle info ready on the app when contacting police or other government authorities.
Edit or delete information
- On the main screen, select the Information tab and tap the information to be altered.
- An edit screen will appear, allowing you to edit or delete content.
Please note that you will not be able recover any of the data (location information, maintenance information, etc.) once the information on the particular vehicle has been deleted.
Switching registration target
If you have already subscribed to the service, you can register up to three devices under one account. To add or switch between the profiles, swipe left or right on the main screen.
5-2. Device registration
- Please have an AlterLock Gen3 device available.
- Tap Register Device on the main screen.
- Select AlterLock Gen3 in “STEP 1.”
- In STEP 2, press the device button for 3 seconds, then tap Start.
- When the Bluetooth pairing request screen appears, tap Pair.
*The pairing request may not appear depending on the smartphone model. - If you are prompted to enter a code on the pairing request screen, please enter “111111.”
*If the firmware version is 1.0.6 or later, entering a code is required. - If the pairing is successful, the message “AlterLock device registration has been completed” is displayed.
*When the device is activated, it enters pairing mode for 60 seconds and the red LED will flash.
*If pairing fails, please restart the application and try again.
*If pairing shows as still in progress, check the Bluetooth settings of your smartphone, and if a device starting with “AlterLock3” is registered, delete it, restart the app and try again.
*If this does not work, try a factory reset (see below).
For iOS
When re-registering a deactivated device, please check the Bluetooth settings of your smartphone and delete the corresponding device starting with “AlterLock3” before re-registering it with the application.
For Android
After registering your device for the first time, you may see the “Allow background connections” message. Tap Open Settings to go to the Location Permissions screen and select Always Allow.
6. Factory reset
A factory reset may be required to re-register a already paired device or re-register it with a different smartphone.
Normally, factory reset is performed as soon as the device is deactivated from the application. However, if you are unable to pair the device due to some problems, please follow the procedure below to perform a factory reset.
- Place the device on a horizontal surface with the AlterLock logo facing down, and press the button for 5 seconds until you hear a ‘beep’ sound.”
- Then place the device with the AlterLock logo facing up, and press the button for 5 seconds until you hear a long ‘beep’ sound.
- After a factory reset, the device enters a shutdown state. Please allow few seconds to let this complete.
To register the device, press and hold the button for 3 seconds to activate it.
- For security reasons, it is designed to be difficult to perform a factory reset with the device installed on the bike. Please remove the device before performing the operation.
- When re-registering a deactivated device, please check the Bluetooth settings of your smartphone and delete the corresponding device starting with “AlterLock3” before re-registering it with the application.
- If the factory reset has already been completed, pressing and holding the button for about 3 seconds will cause the LED to blink for 60 seconds, entering pairing mode. You can proceed with device registration as is.
7. Basic operation and mechanism of operation
7.1. Application screen
The main screen of the application allows you to perform the following operations
- Sensitivity: Adjusts the sensitivity of the motion detection when locked.
*For bicycles, Low is optimized for parking bicycles on bike racks. - Auto-lock: The lock status is automatically toggled according to the Bluetooth connection status and signal strength.
- Notification: Turn on or off notifications to your smartphone when an anomaly is detected.
- Location: Displays a map screen that shows the device location.
- Advanced Settings: Configures advanced settings for the device.
- Bottom of screen: Tap to toggle between lock and unlock mode. The icon on the right side indicates the Bluetooth connection status.
*The device can only be operated while connected via Bluetooth.
*The alarm sound and sounding time can be set in Advanced Settings > Alarm settings.
7-2. Locking and unlocking
When the device is locked, motion detection is enabled. If and when motion is detected, an alarm sounds and a notification is sent to the smartphone.
There are three ways to toggle lock/unlock mode.
Operation from the app
Tap the area at the bottom of the main screen while connected via Bluetooth to the device to toggle lock/unlock mode.
Operation by device button
With the device and Bluetooth-connected smartphone nearby, press the device’s button to toggle lock/unlock.
If the device fails to lock/unlock via the button, this may be caused by weak Bluetooth signal, such as when the smartphone is in your pocket. To fix this, try adjusting the sensitivity level in Advanced Settings > Device > Button Sensitivity via slider.
Auto-lock
When auto-lock is enabled on the main screen, the device determines the Bluetooth connection status, signal strength and automatically switches between lock and unlock mode.
If you find that your smartphone is unintentionally locked due to a weak Bluetooth signal, such as when the smartphone is in your pocket, try adjusting the sensitivity level in Advanced Settings > Device > Auto-lock Sensitivity via slider.
If the lock status is manually changed during auto-lock, the auto-lock will be disabled.
Precautions
*The auto-lock function uses the smartphone’s ability to automatically connect to Bluetooth devices. Depending on the smartphone model and OS version, the Bluetooth connection may not be smooth and the auto-lock function may not work as intended.
*The auto-lock function may not work if the smartphone’s own energy-saving function is enabled or if the necessary permissions are not granted to the application.
*AlterLock app must be running in the background to use the auto-lock function and to lock the device using the main unit buttons. Do not close the application manually, especially on the iPhone.
7-3. Motion detection alarm
- If motion above a certain level is detected when the device is locked, an alarm will go off.
The first time, a warning tone sounds for 10 seconds, and if further motion is detected, a loud alarm is set off. - Notification will be sent to your smartphone after an motion is detected.
- The alarm sound stops after unlocking or after the set time has elapsed.
*Service subscription is required for notification outside of Bluetooth range.
*The first notification may not record location information to prioritize quick notification.
The duration of the first warning sound is 10 seconds regardless of the setting. The alarm sound can be set to sound for a specific period of time and sound pattern in the advanced settings.
*In the default setting, the alarm will not sound even if motion is detected after the third time while the device is locked. This is because it is more suitable in many cases to save the battery to track the device as long as possible rather than to keep the alarm sounding in case of theft. This setting can be changed in the Advanced Settings > Alarm.
*Notification of the initial alarm to the smartphone usually takes a few seconds in the Bluetooth connected state, and may take several tens of seconds in the long range state, depending on the device’s transmission situation.
7-4. Location tracking
While in the lock mode, after the second time motion is detected, the location information is acquired and sent to the smartphone via network.
In order to determine the final position, location data acquisition starts after the device is at rest, not while it is moving.
It may take several seconds to several tens of seconds depending on the transmission environment from the receipt of location information to the notification to the smartphone.
Unlocking the device during location acquisition or transmission will cancel the tracking status.
*If there is a Bluetooth connection with the owner’s smartphone, the location information of the smartphone is acquired to store best result.
*It may take up to 3 minutes to acquire location information for the first time by GPS. If location information is acquired continuously in a short period of time, the acquisition time will be shorter.
*Location information is obtained using GPS or from surrounding Wi-Fi and 4G base stations, depending on the surrounding signal environment and previous transmission results.
*If GPS satellite signals can not be received and there are only few Wi-Fi access points present in the surrounding area, location accuracy may be low or may not be acquirable in certain cases.
8. Other functions
8-1. Crash detection
The crash detection feature can be enabled from the Advanced Settings. Please set your emergency contacts from the application in advance.
Service subscription is required to use this function.
Crash detection works by the following mechanism
- Crash Detection
If the device detects a large impact and subsequent fall, a beep will sounds for 10 seconds. - Notification to emergency contacts
After positioning, it sends a text message to a designated emergency contact asking for assistance. - Cancellation of crash detection
Messages can be stopped by pressing a button on the device within 30 seconds of crash detection.
WARNING
*This function does not guarantee detection and notification of all incidents.
*False detection may occur in driving environments with severe vibration and drops.
*Notification to emergency contacts requires that the device is in a radio environment where data transmission is possible.
8-2. Advanced device settings
For detailed configuration of AlterLock Gen3 devices, please refer to this page.
8-3. Shutdown
For security reasons, this product can not be shut down only by device-side operations.
You can turn off the device from the app’s main screen under Advanced Settings > Device > Shutdown.
When bringing the device on board an aircraft, shut it down beforehand to prevent it from emitting communication radio waves.
9. Battery run time
The estimated run time varies depending on the usage, it is estimated as below for your reference
| Condition | Number of days |
|---|---|
| No movement | Up to 90 days |
| At least one movement per day | Approx. 45-60 days |
| Tracking status at the time of theft | Approx. 30 days |
*In locations with very poor reception, transmission and location positioning times will increase, and battery run time will be much shorter than the above guidelines.
*Although designed to operate over a wide temperature range, environments below 0°C or above 45°C may shorten run time and accelerate battery degradation.
*Battery run time may vary depending on the number of alarms, GPS positioning, data transmission the device performs.
Tips to make your battery last longer
Do not store the device in extremely hot or cold environments
Frequent storage in direct sunlight or in a car during the summer months, prolonged storage in freezing conditions, or repeated charging may damage the battery and reduce product lifetime.
Shutting down the device when not in use for long period of time
When not in use for an extended period of time, shut the device down from the application after charging it for about an hour.
10. About LED display
The relevance between LED indication and operation status of the device is as below
| Status | LED indication |
|---|---|
| Pairing mode | Flashing red (for 60 seconds) *1 |
| Charging | Red light |
| Charging complete | Blue light |
| Low battery | Yellow light *2 |
| Lock | Blue light (1 sec.) |
| Unlock | Blue light (for 2 sec.) |
| Alarm / Positioning / In communication | Flashing blue |
*1. After purchase or factory reset, press and hold the button for 3 seconds to enter pairing mode.
*2. The device can not be started up when the yellow light is on. Charge the battery for a while before starting up.
*Purple color may blink during charging, locking or transmitting. However, this is normal and does not represent error.
If you have any questions, please check our FAQs and feel free contact us via email if you can not find a adequate solution.

